
The oil pan on a car is a vital component that collects and stores the engine oil. It is located underneath the engine and is crucial for ensuring proper lubrication and cooling of the engine’s moving parts.
An oil pan is an essential part of a car’s engine system as it plays a crucial role in collecting and storing the engine oil. Positioned under the engine, it serves to ensure that the engine’s moving parts are adequately lubricated and cooled.
Without an oil pan, the engine’s performance can be compromised, leading to potential damage and decreased lifespan. Understanding the importance of the oil pan on a car is crucial for maintaining optimal engine health and performance. This article will discuss the functions and maintenance required to keep the oil pan in good condition. By following these guidelines, you can ensure the longevity and efficiency of your car’s engine.
Table of Contents
- 1 Common Symptoms Of A Damaged Oil Pan
- 2 Regular Oil Pan Inspection: How To Detect Early Warning Signs
- 3 Proper Oil Changing Procedure For Oil Pan Maintenance
- 4 When To Replace The Oil Pan: Understanding The Limitations Of Maintenance
- 5 Oil Pan Removal And Installation: A Step-By-Step Guide
- 6 Frequently Asked Questions For Oil Pan On Car
- 7 Conclusion
Common Symptoms Of A Damaged Oil Pan
A damaged oil pan on a car can exhibit several common symptoms. These may include oil leaks, low oil pressure, engine knocking noises, and oil contamination. It is important to address these issues promptly to avoid further damage to the vehicle’s engine.
If you own a car, it’s essential to be aware of the signs that could indicate a damaged oil pan. The oil pan is a crucial component of the engine, responsible for storing the oil that lubricates its various moving parts.
A damaged oil pan can lead to significant issues if not addressed promptly. In this section, we will discuss three common symptoms that may indicate a damaged oil pan. Read on to learn more.
Oil Leaks: Identifying Oil Pan Leaks
- Puddles of oil underneath the car: One of the most visible signs of a damaged oil pan is the presence of oil puddles underneath the vehicle when it’s parked. Oil leaks can occur if the oil pan gets punctured or develops cracks.
- Burning oil smell: If you notice a strong burning oil smell coming from your car, it could be due to oil leaking from a damaged oil pan. The oil may come into contact with hot engine parts, causing it to burn and emit a distinct odor.
- Low oil levels: Regularly monitoring the oil level in your car is crucial. If you consistently find yourself needing to top up the oil, it could be a result of an oil pan leak. A damaged oil pan may not be able to retain an adequate amount of oil, causing it to leak out gradually.
Engine Overheating: How A Damaged Oil Pan Can Lead To Overheating
- Impaired oil circulation: A damaged oil pan can hinder proper oil circulation within the engine. Insufficient lubrication can cause excessive friction and heat, leading to engine overheating.
- Reduced cooling system efficiency: The oil pan is part of the cooling system in some vehicles, allowing oil to cool down before recirculating. A damaged oil pan may impede the cooling process, resulting in engine overheating.
Abnormal Engine Noise: Connecting Engine Noise To Oil Pan Issues
- Rattling or knocking sounds: If you notice unusual rattling or knocking sounds coming from the engine, it could be indicative of oil pan problems. A damaged oil pan may cause insufficient oil flow, leading to increased friction and noisy engine operation.
- Tapping or ticking noises: A damaged oil pan can also lead to tapping or ticking noises, especially during acceleration or idle. These noises may be a result of inadequate oil supply reaching critical engine components.
Identifying these common symptoms of a damaged oil pan can help you seek timely repairs, preventing further damage to your car’s engine. Regularly monitoring your vehicle’s oil levels, keeping an eye out for oil leaks, and paying attention to any abnormal engine noises can help you catch potential oil pan issues early on.
Remember, addressing oil pan problems promptly can save you from costly engine repairs down the line.
Credit: lambstire.com
Regular Oil Pan Inspection: How To Detect Early Warning Signs
Regular oil pan inspection is essential for detecting early warning signs of potential issues with your car’s oil pan. By closely examining for leaks, cracks, or damage, you can prevent costly repairs and ensure optimal engine performance.
Regularly inspecting the oil pan on your car is crucial for maintaining its performance and preventing costly repairs down the line. By checking for oil leaks and examining the oil pan for cracks or dents, you can spot early warning signs of potential issues.
In this section, we will guide you through the steps to identify oil pan leaks and common damage indicators.
Checking For Oil Leaks: Steps To Identify Oil Pan Leaks
To ensure that your car’s oil pan is in good condition, it is essential to check for any oil leaks. Here are the steps to help you detect oil pan leaks:
- Start by visually inspecting the area around the oil pan. Look for any signs of oil accumulation or spots on the ground where your vehicle is parked.
- Use a flashlight to examine the oil pan from underneath the car. Look for any visible signs of oil dripping or pooling around the pan.
- Inspect the oil drain plug. If you notice oil residue or leaks coming from the plug, it may indicate a loose or faulty drain plug.
- Check the oil pan gasket. Look for any oil seepage or leakage at the seal between the oil pan and the engine block. A worn-out or damaged gasket can cause oil leaks.
- Pay attention to the oil pan bolts. Ensure they are securely tightened and not causing any leaks.
By following these steps, you can quickly identify oil pan leaks and take prompt action to prevent further damage to your car’s engine.
Examining The Oil Pan For Cracks Or Dents: Common Damage Indicators
Apart from oil leaks, inspecting the oil pan for cracks or dents is equally important. Here are some common damage indicators to look out for:
- Cracks: Carefully examine the oil pan for any visible cracks. Cracks can develop due to various reasons such as impact from road debris, accidents, or corrosion. Cracked oil pans cannot hold oil properly, leading to leaks and engine damage.
- Dents: Check for any dents or deformities on the oil pan’s surface. Dents can occur from hitting speed bumps or other road obstacles. While small dents may not immediately affect oil pan performance, larger dents can disrupt oil flow and potentially cause leaks.
Regularly performing these inspections can help you catch oil pan damage early and address it before it leads to further complications. Remember, proper maintenance of the oil pan is crucial for ensuring the longevity and efficiency of your car’s engine.
By checking for oil leaks and inspecting the oil pan for cracks or dents, you can detect early warning signs of potential issues with your car’s oil pan. Regular inspections and prompt action can help you prevent costly repairs and maintain your vehicle’s performance.
So, make it a habit to regularly inspect your oil pan and ensure its proper functioning.
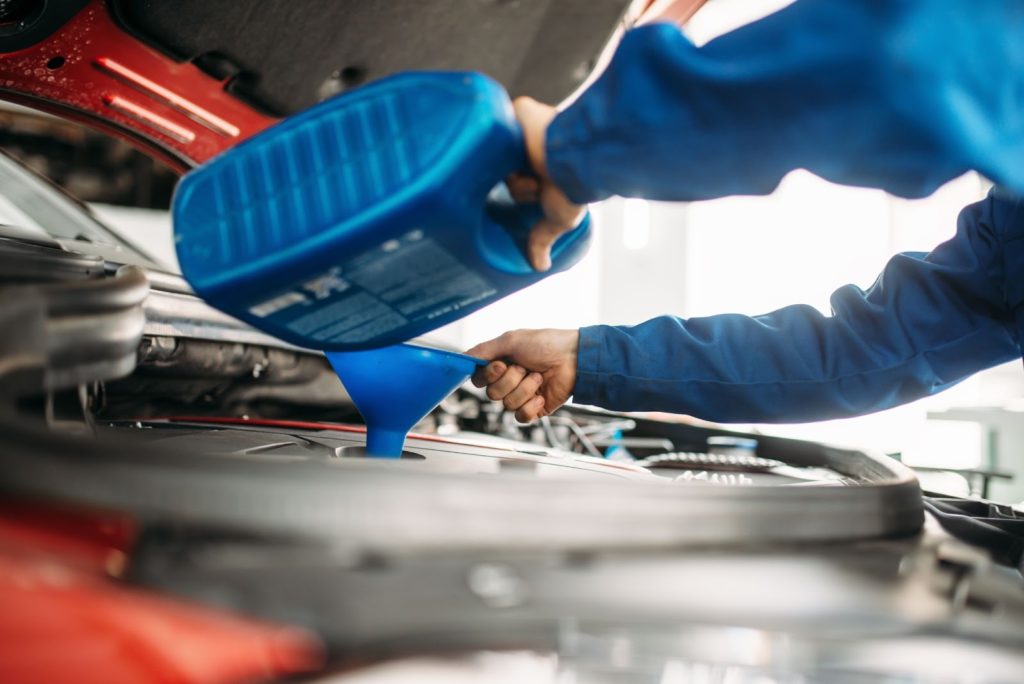
Proper Oil Changing Procedure For Oil Pan Maintenance
The proper oil changing procedure is crucial for maintaining the oil pan on your car. Follow these guidelines to ensure proper maintenance and extend the lifespan of your oil pan.
Draining The Old Oil: Step-By-Step Guide
Oil changes are a crucial part of regular car maintenance to keep your vehicle running smoothly and efficiently. One important aspect of this process is properly draining the old oil from the oil pan. To help you navigate this task with ease, follow the step-by-step guide below:
- Safety first: Ensure that your car is parked on a flat surface and the engine has cooled down to avoid any potential burns or accidents.
- Locate the oil drain plug: The oil pan is typically positioned underneath the car’s engine. Find the oil drain plug, which is a bolt-like object that secures the oil pan.
- Position the oil catch pan: Place an oil catch pan directly underneath the oil drain plug to collect the old oil. Ensure it’s wide enough to catch any oil that may splash during the draining process.
- Loosen the drain plug: Using a socket wrench or a specialized oil drain plug tool, carefully loosen the drain plug by turning it counter-clockwise. Be prepared for a small amount of resistance before it starts to loosen.
- Drain the old oil: Once the drain plug is loose, slowly and steadily unscrew it completely, allowing the old oil to flow into the catch pan. Give it some time to fully drain out.
- Inspect the drain plug: While the oil is draining, inspect the drain plug for any signs of damage or excessive wear. If necessary, replace it with a new one to prevent leaks.
- Replace the drain plug: Once all the old oil has been drained, carefully clean the drain plug and its surrounding area. Then, reposition and tighten the drain plug back into place using your hand until it’s snug. Be cautious not to overtighten, as it may strip the thread or damage the oil pan.
- Dispose of the used oil responsibly: Transfer the old oil from the catch pan to a suitable container for disposal. Remember, used motor oil should never be thrown away with regular household waste. Check local regulations for recycling or disposal options in your area.
Removing and Replacing the Oil Pan Gasket: Ensuring a Proper Seal
The oil pan gasket plays a vital role in maintaining a secure seal between the oil pan and the engine block. Over time, this gasket may deteriorate or wear out, leading to oil leaks. Here’s what you need to know about removing and replacing the oil pan gasket:
- Preparation:
- Lift the front end of your car using a jack until it’s high enough for you to work comfortably underneath.
- Place jack stands on both sides of the vehicle to provide additional support and safety.
- Removal:
- Once safely positioned, locate and remove all the bolts securing the oil pan to the engine block.
- Gently tap the oil pan with a rubber mallet to loosen the gasket’s seal and carefully separate the pan from the block.
- Clean the oil pan and engine block surfaces thoroughly to remove any remnants of the old gasket.
- Replacement:
- Apply a thin layer of oil-resistant sealant to the new oil pan gasket to enhance its sealing capabilities.
- Carefully position the new gasket on the engine block, aligning it with the bolt holes.
- Reattach the oil pan to the engine block, hand-tightening the bolts before using a torque wrench to achieve the manufacturer’s recommended torque settings.
- Testing the seal:
- Once you’ve replaced the oil pan gasket, let the sealant cure for the recommended time.
- Afterward, start the engine and let it run for a few minutes while monitoring for any signs of oil leaks around the oil pan.
- If you notice any leaks, inspect the gasket and bolts, making sure they are properly secured and tightened.
Proper maintenance of your car’s oil pan is essential to prevent oil leaks and avoid potential damage to your engine. By following the step-by-step guide for draining old oil and properly replacing the oil pan gasket, you can ensure a smooth and reliable engine performance.
Remember to adhere to safety precautions and dispose of used oil responsibly.
When To Replace The Oil Pan: Understanding The Limitations Of Maintenance
Understanding the limitations of maintenance is crucial when it comes to knowing when to replace the oil pan on your car. By staying aware of signs like leaks and damage, you can ensure the longevity and performance of your vehicle.
The oil pan is a crucial component of a car’s engine, serving as a reservoir for engine oil. Over time, it can experience wear and tear, leading to potential leaks and other issues. While regular maintenance can extend the lifespan of the oil pan, there are limitations to how much it can withstand.
In this section, we will discuss the signs of irreparable damage that indicate the need for an oil pan replacement. Additionally, we will explore the golden opportunities for oil pan replacement and the ideal timing for such maintenance tasks.
Signs Of Irreparable Damage: Knowing When To Replace
- Visible cracks or holes: Inspect your oil pan regularly for any visible cracks, holes, or other signs of damage. These can be caused by road debris or accidental impacts. If you notice any of these issues, it’s crucial to replace the oil pan promptly to prevent oil leaks and further damage to the engine.
- Leaking oil: Pay attention to any oil leaks coming from the oil pan. If you consistently find oil puddles beneath your parked car, it could indicate a worn-out gasket or a crack in the oil pan. Such leaks can lead to inadequate lubrication and potential engine damage if not addressed promptly.
- Rust and corrosion: Due to exposure to moisture, the oil pan can develop rust and corrosion over time. Inspect the oil pan for any signs of rust, especially in older vehicles or those driven in areas with high humidity or harsh weather conditions. Severe rust or corrosion can weaken the structure of the oil pan, necessitating a replacement.
- Damaged drain plug threads: The drain plug, which allows for easy oil changes, screws into the oil pan with threads. If the threads become damaged or stripped, it can result in oil leaks during oil changes. In such cases, replacing the oil pan is often the most effective solution.
- Ineffective oil pan repair: Attempting to repair a damaged oil pan may seem like a cost-effective option, but it can often be a temporary fix. The integrity of the oil pan may be compromised, making it susceptible to future damage. In such situations, replacing the oil pan is a more reliable and long-lasting solution.
Golden Opportunities For Oil Pan Replacement: Ideal Timing
- During major engine repairs: If your vehicle is undergoing major engine repairs, such as replacing the oil pump or performing a complete engine overhaul, it is an opportune time to replace the oil pan as well. This ensures that all components are in optimal condition, reducing the risk of future issues.
- When the oil pan is accessible: The accessibility of the oil pan can greatly influence the ease and cost of its replacement. If, for instance, your car’s oil pan can be easily accessed without disassembling other components, it is wise to replace it during regular maintenance or as part of an oil change to save time and effort.
- When the vehicle reaches high mileage: As a vehicle ages and accrues high mileage, the oil pan may become more susceptible to wear and damage. A preventive replacement of the oil pan during routine maintenance can offer peace of mind and help prolong the lifespan of the engine.
- When upgrading to a performance oil pan: If you are considering upgrading your vehicle’s oil pan to a high-performance variant, it presents an excellent opportunity to replace the stock oil pan. Performance oil pans often provide better oil control, improved cooling, and increased oil capacity, enhancing the overall performance of the engine.
Understanding the limitations of maintenance for your car’s oil pan is essential. By recognizing the signs of irreparable damage and taking advantage of golden opportunities for replacement, you can ensure the longevity and reliability of your vehicle’s engine. Regular inspections and proactive maintenance are key to avoiding costly repairs and maintaining optimal engine performance.
Oil Pan Removal And Installation: A Step-By-Step Guide
Learn how to remove and install the oil pan on your car with this step-by-step guide. This comprehensive tutorial will walk you through the process, ensuring a smooth and successful oil pan replacement.
Removing The Damaged Oil Pan: A Detailed Procedure
When it comes to removing a damaged oil pan from your car, it’s important to follow a step-by-step process to ensure a successful removal without causing any further damage. Here is a detailed procedure to guide you:
- Preparation:
- Park your car on a flat surface and engage the parking brake.
- Allow the engine to cool down completely before starting the procedure.
- Lift the Car:
- Securely position a jack under your car and lift it until you can easily access the oil pan.
- Place jack stands under the car to ensure stability and safety.
- Drain the Oil:
- Locate the oil drain plug on the oil pan and place a drain pan directly under it.
- Use a socket wrench to carefully loosen the drain plug, allowing the oil to drain completely.
- Once the oil has drained, securely tighten the drain plug to prevent leaks.
- Remove the Oil Pan:
- Locate and remove all bolts securing the oil pan to the engine block.
- Slowly and carefully pry the oil pan away from the engine, ensuring not to damage any surrounding components.
- If necessary, gently tap the oil pan with a rubber mallet to loosen it further.
- Clean the Pan Area:
- Thoroughly clean the engine block surface where the oil pan was attached, removing any old gasket material or debris.
- Ensure the surface is smooth and free of any leftover oil or contaminants.
Installing The New Oil Pan: Tips And Tricks
Now that you have successfully removed the damaged oil pan, it’s time to install a new one. Here are some tips and tricks to help you with the installation process:
- Apply Sealant:
- Apply a thin layer of oil-resistant sealant to the engine block surface where the oil pan will be attached.
- This will help create a tight seal and prevent oil leaks.
- Position the Oil Pan:
- Carefully position the new oil pan onto the engine block, aligning it with the bolt holes.
- Ensure that the pan is sitting flush against the engine block and make any necessary adjustments.
- Install the Bolts:
- Insert and hand-tighten the bolts securing the oil pan to the engine block.
- Gradually tighten the bolts in a crisscross pattern to ensure even pressure distribution.
- Consult your car’s manual for the recommended torque specifications.
- Reinstall Drain Plug:
- Reinstall the drain plug into the new oil pan and securely tighten it.
- Lower the Car and Refill with Oil:
- Carefully lower the car from the jack stands, ensuring it is on a stable surface.
- Refill the engine with the recommended amount and type of oil, according to your car’s specifications.
By following these step-by-step instructions and utilizing the provided tips and tricks, you can easily remove and install a new oil pan on your car. Remember to always reference your car’s manual and take necessary safety precautions throughout the process.
Frequently Asked Questions For Oil Pan On Car
How Much Does It Cost To Replace An Oil Pan On A Car?
The cost to replace an oil pan on a car varies, but it generally ranges from $200 to $500.
Can You Drive A Car With An Oil Pan Leak?
Yes, you can drive a car with an oil pan leak, but it’s risky and can cause damage to your engine.
What Happens If Oil Pan Goes Bad?
The oil pan plays a crucial role in a vehicle’s functioning. If it goes bad, it can lead to oil leakage and engine damage.
How Much Does It Cost To Fix An Oil Pan Leak?
The cost of fixing an oil pan leak can vary depending on various factors.
Conclusion
Taking care of your car’s oil pan is crucial for the smooth functioning and longevity of your vehicle. Regular maintenance and inspection of the oil pan can save you from potential engine damage and costly repairs. Whether it’s checking for leaks, cleaning the oil pan, or replacing it altogether, staying proactive is key.
Remember to use the right tools and follow the manufacturer’s instructions when working on the oil pan. By doing so, you ensure that your car’s engine is well-lubricated and protected, allowing it to perform at its best. Neglecting the oil pan can lead to oil leaks, engine overheating, and other complications.
So, make the oil pan a priority in your car maintenance routine, and enjoy a smooth and trouble-free driving experience for years to come.