
To evacuate a car AC system, follow these steps carefully: 1) Locate the service valves on the AC system, typically found near the firewall of the car. 2) Connect a vacuum pump to the low-pressure service valve using a gauge set and open the low and high-side valves.
(19 words) When it comes to evacuating a car AC system, it is important to follow specific steps to ensure a successful process. This includes locating the service valves on the AC system, typically found near the firewall of the car, and connecting a vacuum pump to the low-pressure service valve using a gauge set.
By opening the low and high-side valves, you can effectively evacuate the car AC system. This article will provide a step-by-step guide on how to properly evacuate a car AC system to ensure optimal performance. (113 words)
Table of Contents
- 1 Understanding The Importance Of Evacuating The Car Ac System
- 2 Gathering The Tools And Equipment Needed For The Job
- 3 Step-By-Step Guide To Evacuating The Car Ac System
- 4 Troubleshooting Common Issues During The Evacuation Process
- 5 Safety Precautions And Tips For Successful Evacuation
- 6 Recharging The Car Ac System After Evacuation
- 7 Maintenance And Care Tips For A Well-Functioning Car Ac System
- 8 Frequently Asked Questions On How To Evacuate Car Ac System
- 9 Conclusion
Understanding The Importance Of Evacuating The Car Ac System
Understanding the importance of properly evacuating your car’s AC system is crucial to maintaining its efficiency and preventing potential damage. Follow these steps to effectively evacuate the system, ensuring optimal performance and longevity of your car’s AC.
Evacuating the car AC system is a crucial step in ensuring its optimal performance. This process involves removing any air and moisture present inside the system. Failing to properly evacuate the AC system can lead to a range of issues, including reduced cooling efficiency and potential damage to various components.
Let’s explore why it is necessary to evacuate the car AC system and the consequences of not doing it correctly.
Why Is It Necessary To Evacuate The Car Ac System?
- Removal of air and moisture: Evacuating the car AC system helps eliminate air, water vapor, and any other contaminants that may have entered the system. This ensures that the refrigerant can flow freely, preventing any potential blockages or reduced cooling capabilities.
- Prevention of corrosion: Moisture inside the AC system can corrode various components, such as the compressor and condenser. Evacuating the system removes excess moisture, reducing the risk of corrosion and extending the overall lifespan of these crucial parts.
- Optimal refrigerant charge: By evacuating the AC system, technicians can ensure that the correct amount of refrigerant is added. This helps maintain the system’s efficiency and prevents issues like overcharging or undercharging, which can impact cooling performance.
- Elimination of contaminants: During the evacuation process, any residual debris or contaminants within the system are purged. This includes particles that may have entered during repairs or servicing. Removing these contaminants is essential for maintaining the proper functioning of the AC system.
What Happens If The Ac System Is Not Properly Evacuated?
- Reduced cooling efficiency: Failing to evacuate the car AC system can trap air and moisture, leading to decreased cooling efficiency. The presence of air can disrupt the circulation of refrigerant and hamper the system’s ability to cool the interior of the car effectively.
- Higher energy consumption: If the AC system is not properly evacuated, it may result in increased energy consumption. The system will have to work harder to compensate for the reduced cooling efficiency caused by the presence of air and moisture.
- Potential damage to components: Moisture and contaminants left within the AC system can cause damage to critical components, such as the compressor, expansion valve, or evaporator. This can lead to expensive repairs or even the need for component replacement.
- System failure: If air and moisture persist within the AC system, it can lead to system failure over time. This can result in complete loss of cooling capability and require extensive repairs to rectify the issue.
Evacuating the car AC system is a crucial step to ensure optimal performance and prevent potential damage. By removing air, moisture, and contaminants, technicians can maintain the cooling efficiency of the system, prolong its lifespan, and prevent costly repairs. So, it is essential to prioritize the proper evacuation of your car AC system to enjoy reliable and efficient cooling during hot summer days.
Gathering The Tools And Equipment Needed For The Job
To successfully evacuate the car AC system, gather all the necessary tools and equipment required for the job. Having the right tools will ensure a smooth and efficient process.
Before embarking on the task of evacuating your car AC system, it is essential to gather all the necessary tools and equipment. Having the right equipment on hand ensures a smooth and efficient process, giving you better control over the task at hand.
Here is a list of tools you will need:
- Vacuum pump: A vacuum pump plays a crucial role in drawing out moisture and air from the AC system, preparing it for a proper recharge. Without it, the process will not be effective.
- Manifold gauge set: This tool helps you monitor the pressure levels and temperatures within the AC system. It allows you to accurately diagnose any issues and evaluate the system’s performance.
- Safety glasses and gloves: Working with AC systems involves handling chemicals and potentially high pressures. Wearing safety glasses and gloves protects you from any potential hazards.
- Refrigerant recovery machine: This equipment safely removes and stores any remaining refrigerant from the system. It is a crucial tool to prevent harmful discharge into the environment.
- AC system flush kit: If you suspect contamination or debris within the system, an AC system flush kit helps clean and remove any residue before recharging the system.
- Leak detection kit: This tool assists in locating any leaks in the AC system. It is essential to identify and repair leaks to ensure optimal performance and prevent refrigerant loss.
- Refrigerant: To recharge the AC system, you will need the appropriate refrigerant for your car’s make and model. Make sure to check the vehicle’s specifications before purchasing the refrigerant.
Having the right tools and equipment is of utmost importance. Skipping or using the wrong equipment can compromise the effectiveness of the process and potentially damage your car’s AC system. So, gather all the necessary tools and equipment before proceeding to ensure a successful evacuation of your car AC system.
Step-By-Step Guide To Evacuating The Car Ac System
Looking for a step-by-step guide on how to evacuate your car’s AC system? This informative article provides clear instructions on how to safely and effectively evacuate the AC system in your car. Follow these simple steps to ensure optimal performance and longevity of your car’s AC system.
Step 1: Preparing The Car And Ensuring Safety
Before you begin evacuating the car AC system, it is important to ensure your safety and properly prepare the vehicle. Here are the steps you need to follow:
- Park the car in a well-ventilated area and engage the parking brake to prevent any accidents.
- Put on protective gloves and safety goggles to protect yourself from any refrigerant leaks or harmful chemicals.
- Open the car hood and locate the AC system’s high and low-pressure service ports.
- Inspect the AC system for any visible damage, such as leaks or loose connections. Address these issues before proceeding.
Step 2: Removing Refrigerant From The System
To evacuate the car AC system, you need to remove the refrigerant gas. Follow these steps:
- Connect the AC manifold gauge set to the high and low-pressure service ports of the AC system.
- Ensure that the valves on the manifold gauge set are closed before proceeding.
- Start the car’s engine and turn on the AC system to its maximum setting. Let it run for a few minutes to stabilize the pressures.
- Slowly open the low-pressure valve on the manifold gauge set to release the refrigerant gas into a recovery machine or an approved container.
- Monitor the manifold gauge set to observe the pressure levels until the refrigerant has been completely removed.
Step 3: Checking For Leaks
Before proceeding with the evacuation process, it is essential to check for any leaks in the car AC system. Here’s what you need to do:
- Apply soapy water or refrigerant leak detector solution to all the AC system connections, hoses, and components.
- Inspect for any bubbles or signs of leakage, which indicate a faulty component or connection.
- Tighten any loose fittings or replace damaged components to ensure a leak-free system.
Step 4: Evacuating The System Using A Vacuum Pump
Now it’s time to evacuate the car AC system using a vacuum pump. Follow these steps carefully:
- Attach the vacuum pump hose to the low-pressure service port of the AC system.
- Close the high-pressure service port valve on the manifold gauge set and open the low-pressure service port valve.
- Turn on the vacuum pump and let it run for approximately 30 minutes. This will remove any moisture, air, and remaining refrigerant from the system.
- Monitor the vacuum gauge on the manifold gauge set to ensure a proper vacuum level is achieved.
Step 5: Monitoring The Vacuum Level
Once you have evacuated the car AC system, you need to monitor the vacuum level to ensure there are no leaks. Here’s what you should do:
- Close the low-pressure service port valve on the manifold gauge set and turn off the vacuum pump.
- Observe the vacuum gauge on the manifold gauge set for at least 15 minutes. If the vacuum level remains stable, it indicates that the system is sealed.
- If the vacuum level drops, it is a sign of a leak that needs to be addressed before proceeding.
Step 6: Confirming System Readiness For Recharging
Before recharging the car AC system, you must ensure that it is ready for the process. Follow these final steps:
- Close the low-pressure service port valve on the manifold gauge set and disconnect the vacuum pump hose.
- Make sure all the valves on the manifold gauge set are closed.
- Let the car AC system sit undisturbed for at least 15 minutes to verify that the vacuum level remains stable.
- If the system holds the vacuum without any noticeable pressure drop, it is ready for recharging.
Remember, evacuating a car AC system requires proper knowledge and skills. If you are not confident, it is advisable to consult a professional technician. Stay safe while working with refrigerant substances and always adhere to manufacturer guidelines.
Troubleshooting Common Issues During The Evacuation Process
During the car AC system evacuation process, troubleshooting common issues is crucial. Ensure a smooth evacuation by identifying and resolving problems such as leaks, insufficient vacuum pressure, or damaged components. Follow these steps to evacuate the car AC system efficiently and effectively.
Identifying Leaks And How To Fix Them:
- Leaks in the car AC system can prevent efficient evacuation. Here’s how you can identify and fix them:
- Inspect the AC system for physical damage, such as cracks or holes in hoses, connections, or components. Use an LED UV leak detection kit to identify leaks.
- Tighten any loose connections or fittings using a wrench, ensuring proper sealing.
- Use a refrigerant leak detector to check for leaks. Start at the compressor and move along the AC system, checking all hoses, fittings, and components for any signs of leakage.
- If a leak is detected, you can fix it using one of the following methods:
- For minor leaks, use a refrigerant stop leak additive. This can temporarily seal small leaks and prevent further refrigerant loss.
- Replace damaged hoses, o-rings, or seals. Ensure you use compatible parts and follow the manufacturer’s instructions.
- In case of major leaks or severe damage, consult a professional technician to assess and repair the issue.
Dealing With Low Vacuum Levels:
- Proper vacuum levels are crucial to ensure an efficient evacuation of the car AC system. Here’s what to do if you encounter low vacuum levels during the evacuation process:
- Check the vacuum pump for any mechanical issues, such as worn-out seals or a faulty motor. Repair or replace the pump as needed.
- Ensure the AC system valves are fully closed. Leaking valves can result in low vacuum levels. Tighten or replace faulty valves as required.
- Double-check all connections to ensure they are tight and well-sealed. Any air leaks can cause low vacuum levels. Use Teflon tape or thread sealant to create a tight seal if necessary.
- If the low vacuum levels persist, it could indicate a problem with the AC system itself. Consult a professional technician to diagnose and resolve the issue.
Addressing Other Potential Problems During Evacuation:
- Apart from leaks and low vacuum levels, there are other potential issues that may arise during the evacuation process. Here’s how to address them:
- Ensure the AC system is properly connected to the vacuum pump. Improper connections can result in air leaks and inefficient evacuation.
- Check for any blockages in the AC system, such as clogged hoses or components. Clear any obstructions to allow proper airflow during the evacuation process.
- Verify that the AC system is turned on and set to its maximum cooling position. This ensures that the compressor is engaged and circulating refrigerant, facilitating the evacuation process.
- Monitor the vacuum gauge closely during the evacuation. Any sudden fluctuations or abnormal readings could indicate an underlying problem. Take appropriate action based on the issue detected.
- If you are unsure about any step or encounter persistent problems during the evacuation process, it is advisable to seek professional assistance from a qualified technician.
Remember, troubleshooting common issues during the evacuation process can help ensure a successful and efficient evacuation of the car AC system. Identifying and fixing leaks, addressing low vacuum levels, and resolving other potential problems will contribute to the overall effectiveness of the evacuation process.
Safety Precautions And Tips For Successful Evacuation
Looking for safety precautions and tips for successfully evacuating your car AC system? Check out this concise guide that provides all the necessary steps for a safe and effective evacuation process. Find out how to avoid common mistakes and ensure a successful outcome for your car’s AC system.
Evacuating the car AC system is an essential part of any maintenance or repair work. However, it is crucial to prioritize safety during the evacuation process. By wearing the proper personal protective equipment, handling refrigerants safely, and following a few tips, you can ensure a successful and efficient evacuation.
Let’s explore each aspect in detail:
Wearing Proper Personal Protective Equipment
To safeguard yourself from potential risks when evacuating the car AC system, it is essential to wear the right personal protective equipment. Here’s what you need:
- Safety goggles: Protect your eyes from refrigerant splashes and debris.
- Gloves: Shield your hands from refrigerant chemicals and any sharp objects.
- Long-sleeved shirt and pants: Prevent direct skin contact with refrigerants.
- Closed-toe shoes: Safeguard your feet from potential hazards.
Handling Refrigerants Safely
When working with refrigerants, it’s vital to handle them with care. Here are some safety tips to follow:
- Always use approved refrigerant recovery and recycling equipment.
- Ensure proper ventilation in the working area to avoid inhaling harmful fumes.
- Do not puncture or forcefully open refrigerant containers.
- Follow the manufacturer’s guidelines for handling, storing, and disposing of refrigerants.
- Never mix different types of refrigerants.
Tips For Ensuring A Successful And Efficient Evacuation Process
To carry out a successful evacuation and achieve optimal results, consider the following tips:
- Check the condition of the AC system and identify any leaks or damaged components before starting the evacuation.
- Use a vacuum pump specifically designed for automotive AC systems and follow the manufacturer’s instructions for operation.
- Attach the vacuum pump to both the low and high-pressure ports of the AC system for a complete evacuation.
- Let the vacuum pump run for the recommended time, ensuring that it reaches the proper vacuum level as specified by your vehicle’s manufacturer.
- Monitor the vacuum gauge during the evacuation process to ensure stability and detect any potential issues.
- If there are persistent leaks, investigate and fix them before proceeding with the evacuation.
- Once the evacuation is complete, close the service valves and disconnect the vacuum pump before proceeding with the next steps in the AC system maintenance or repair process.
By prioritizing safety, wearing the necessary personal protective equipment, and following the recommended practices, you can evacuate your car AC system successfully. Remember to always refer to the vehicle manufacturer’s guidelines and consult a professional if needed.
Recharging The Car Ac System After Evacuation
After evacuating the car AC system, it is essential to recharge it properly. Follow these steps to effectively recharge the system and ensure optimal cooling performance in your car.
Importance Of Recharging After Evacuation:
Recharging the car AC system after evacuation is a crucial step that should not be overlooked. Evacuating the system removes the old refrigerant, along with any moisture or contaminants that may have accumulated. However, without recharging, your AC system will not be able to cool the air effectively.
This is why it’s important to understand the process of recharging the AC system properly. So, let’s dive into the step-by-step guide below.
Step-By-Step Guide To Recharging The Ac System:
To recharge the car AC system after evacuation, follow these steps:
- Gather the necessary tools and materials:
- Refrigerant: Ensure that you have the correct refrigerant type and amount for your car’s AC system.
- Manifold gauge set: This tool allows you to monitor the pressure levels in the system.
- Safety goggles and gloves: Protect yourself from any potential refrigerant leaks.
- Locate the low-pressure port:
- Refer to your car’s user manual or AC system diagram to find the low-pressure port. It is usually located on the larger, low-pressure side of the system.
- Remove the port’s protective cap.
- Attach the manifold gauge set:
- Connect the blue hose of the gauge set to the low-pressure port.
- Connect the red hose to the refrigerant canister.
- Adjust the gauge set:
- Open both the high and low-side valves on the manifold gauge set.
- Start the car’s engine and turn on the AC to the highest setting.
- Monitor the pressure levels:
- Observe the pressure readings on the manifold gauge set.
- Compare the readings to the recommended levels specified in your car’s manual.
- Recharge the AC system:
- If the pressure is low, gradually open the refrigerant canister’s valve to introduce refrigerant into the AC system.
- Continuously monitor the pressure readings to prevent overcharging.
- Stop recharging:
- Close the valve on the refrigerant canister once the pressure readings reach the recommended levels.
- Disconnect the gauge set from the low-pressure port.
- Test the cooling performance:
- Allow the AC system to run for a few minutes to assess its cooling performance.
- Make sure the air blowing out of the vents feels cool.
- Check for any leaks:
- Inspect the AC system for any signs of refrigerant leaks.
- If you notice any leaks, it is advisable to consult a professional for repairs.
- Recap and maintain records:
- Recap the steps you have followed and maintain a record of the refrigerant type, amount, and date of recharge. This will help with future maintenance and troubleshooting.
By following this step-by-step guide, you can effectively recharge the car AC system after evacuation, ensuring optimal cooling performance. Remember, if you are unsure or uncomfortable with the process, it is always better to seek professional assistance. Stay cool on the road!
Maintenance And Care Tips For A Well-Functioning Car Ac System
For a well-functioning car AC system, it is crucial to evacuate it properly. Follow these maintenance and care tips to ensure optimal performance and longevity of your car’s AC system.
Regular Maintenance Practices To Keep The Ac System In Good Condition
- Keep the AC system clean by regularly checking and replacing the cabin air filter. A dirty filter can restrict airflow and lower system efficiency.
- Inspect the condenser fins for any debris or damage. Clean them with a soft brush or compressed air to ensure proper heat transfer.
- Check the refrigerant levels regularly using a pressure gauge. If the levels are low, it may indicate a leak that needs to be fixed by a professional.
- Clean the evaporator drain tube to prevent water accumulation and potential mold growth. A blocked drain tube can cause water to leak into the car.
- Ensure that the AC compressor belt is in good condition and properly tensioned. A loose or damaged belt may lead to poor AC performance.
- Test the AC system regularly to ensure it is cooling properly. If you notice any changes in temperature, airflow, or unusual noises, it may indicate a problem that requires attention.
- Maintain proper coolant levels as defined by the manufacturer. Low coolant levels can lead to poor cooling performance and potential damage to the AC system.
- Regularly lubricate the AC system’s moving parts, such as the compressor clutch and blower motor, to reduce friction and prevent wear.
- Protect the AC system from excessive heat by parking your car in shaded areas or using window shades to block direct sunlight.
- Schedule annual professional inspections and servicing to identify and address any potential issues before they escalate.
How To Troubleshoot Common Ac System Issues
- No cold air: Check if the AC system is turned on and the temperature set correctly. Verify that the AC compressor is engaging when the AC is turned on. If the system is still not cooling, it may indicate a refrigerant leak, faulty compressor, or a blocked orifice tube.
- Weak airflow: Inspect the cabin air filter and clean or replace it if dirty. Check for any restrictions in the ductwork or vents. A faulty blower motor or a blocked evaporator coil could also be the cause.
- Strange odors: Clean or replace the cabin air filter if it is dirty. Musty odors may indicate mold or bacterial growth on the evaporator coil. Consider using an antibacterial cleaner to eliminate the odor.
- Noise during operation: Unusual noises, such as squealing or grinding, could be a sign of a failing compressor or a worn-out belt. Have a professional inspect and repair any issues promptly.
- AC system not functioning: If the AC system fails to turn on, check the fuses and relays related to the AC system. Electrical issues or a faulty control panel may be the cause. Consult a professional for further diagnosis and repair.
Remember, regular maintenance and prompt troubleshooting can help keep your car’s AC system running smoothly and ensure your comfort on the road.
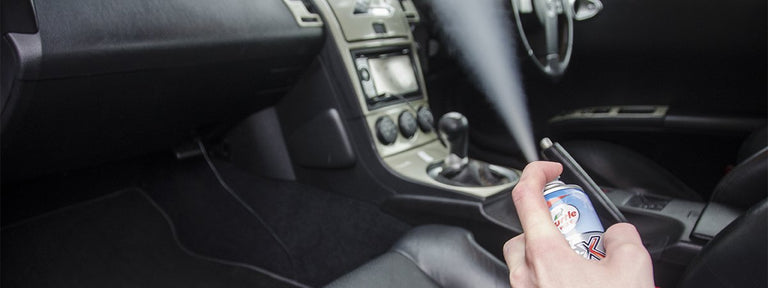
Credit: www.turtlewax.com
Frequently Asked Questions On How To Evacuate Car Ac System
How Do I Evacuate My Car Ac Without A Pump?
To evacuate your car AC without a pump, follow these steps: 1. Turn on the engine and AC to the maximum setting. 2. Locate the low-pressure valve on the AC system. 3. Attach a gauge and hose to the valve.
4. Release the refrigerant by opening the valve slowly. 5. Keep an eye on the pressure gauge until it reaches zero. 6. Close the valve and disconnect the hose.
How Do You Purge The Ac In A Car?
To purge the AC in a car, follow these steps: 1. Start the engine and turn on the AC system. 2. Set the air to the maximum cool and fan to the highest speed. 3. Open all the windows and ensure the recirculation mode is off.
4. Let the AC run for a few minutes to remove any stale air and replace it with fresh air.
Do You Have To Evacuate A Car Ac System?
Yes, car AC systems need to be evacuated to properly maintain and repair them.
How Long Should You Evacuate A Car Ac System?
Evacuate a car AC system for about 30-45 minutes to remove air and moisture.
Conclusion
To summarize, evacuating your car AC system is a crucial maintenance step that ensures optimal performance. By following the correct procedures and using the right tools, you can remove any contaminants or excess moisture that may be compromising your system’s efficiency.
Regularly evacuating your car AC system can prevent potential damage and costly repairs down the line. It’s essential to prioritize the health of your car’s AC system to experience comfortable and reliable cooling during hot summer months. Remember to consult your vehicle’s manual for specific instructions and safety precautions.
Whether you choose to handle this task yourself or seek professional assistance, regular evacuation is vital in maintaining the longevity and efficiency of your car’s AC system. Stay cool and enjoy a refreshing driving experience throughout the year.